Are you looking to join the ranks of poultry farmers or are you looking to optimise an existing facility? The incubation system is one of the key elements that will make your job easier. However, owning an incubator is not enough – you need to know how to use it. Follow the guide!
- 1 What is an egg incubator?
- 2 Why is it important to improve your incubator?
- 3 Machines with optimal hatching conditions
- 4 Optimise the room temperature
- 5 Pay attention to the temperature of the incubator
- 6 Check the humidity level of the incubator
- 7 Consider providing a ventilation system for your egg incubator
- 8 Optimal egg turning is beneficial
- 9 Humidity: an important factor to improve
- 10 The means of action
- 11 Increasing the humidity in your incubator
What is an egg incubator?
A hen lays an average of 1 egg per day. She naturally starts to incubate it within 10 days. It will then take 21 days for a chick to break its shell. However, some hens are reluctant to brood, which means that the eggs laid have no chance of hatching. In this case, it is necessary to use an incubator.
Artificial incubators are therefore used to incubate fertilised eggs to produce chicks. The hatching rate is very close to 100%.
There are three types of incubators:
- The manual models, which are mainly intended for beginners wishing to incubate a small quantity of hen eggs,
- Semi-automatic models which are more accurate than the manual versions,
- The automatic incubator which works autonomously once you have configured it.
Contrary to popular belief, this type of incubator is suitable for both beginners and experienced breeders.
Why is it important to improve your incubator?
Hatching chicken eggs is more complex than you might think. Even though machines are constantly evolving, it is still essential to set the right parameters. Depending on your equipment, manual intervention may also be necessary until the eggs hatch. It is therefore important to plan solutions to optimise the operation of the incubator. It is essentially a question of determining the right settings and adopting the right gestures to boost your chances of seeing eggs hatch at term.
Improving the operation of an incubator is not just about selecting the right settings. It is also about the environment in which you set up the machine and how you monitor the incubation process. From the outset, it is important to be precise, but rest assured that the basic rules are easy to apply.
Machines with optimal hatching conditions
Of course, incubating eggs is a natural process for a hen. However, incubating eggs artificially has the advantage of offering more convenience to breeders. The 21 days required for a chick to be born is a guide.
In some cases, a few more days are needed. The hen is therefore immobilised. If you are aiming for continuous laying, it makes sense to use an incubator to house the fertilised eggs. The hen can then continue to lay eggs at her leisure.
During the incubation period, it is important that the eggs are turned regularly. There is a risk that the eggs will break or fall out accidentally if the hen changes her position. However, these risks are almost non-existent when you use an artificial incubator. The hatching rate is therefore naturally higher, which goes hand in hand with an optimal yield from your farm.
In addition, there are machines that allow the eggs to be transferred from the incubator to the hatching without breaking them. ECAT-ID has developed a suction cup transfer unit. This guarantees optimal incubation conditions without damaging the eggs!
Optimise the room temperature
Before we look at improving the performance of an incubator in the literal sense, it is important to ensure that the environment is suitable for artificial incubation. The room temperature is particularly important as it influences the settings of the incubator, especially if you are using an automatic model.
Make sure that the room is at a constant temperature of between 18°C and 20°C. The less variable the temperature, the more stable the humidity level and the easier it will be to hatch your eggs.
As you will have understood, an egg incubator cannot be installed in just any room, although it is generally more practical to place it in a cellar or garage. Ideally, place your equipment in a living room. If not, make sure the space has a heating system that allows you to regulate the room temperature. As with the heating of your home, it is important to ensure that the room in which your incubator is housed is heated.
Pay attention to the temperature of the incubator
You have collected your eggs and are about to start incubation. You will maximise your chances of hatching by switching on the machine 12 hours before hatching begins. This means that it is important to start the incubator well in advance of placing your hen eggs in it. The 12-hour delay allows the machine to reach the right temperature and therefore to welcome the eggs in a warm cocoon, favourable to their development.
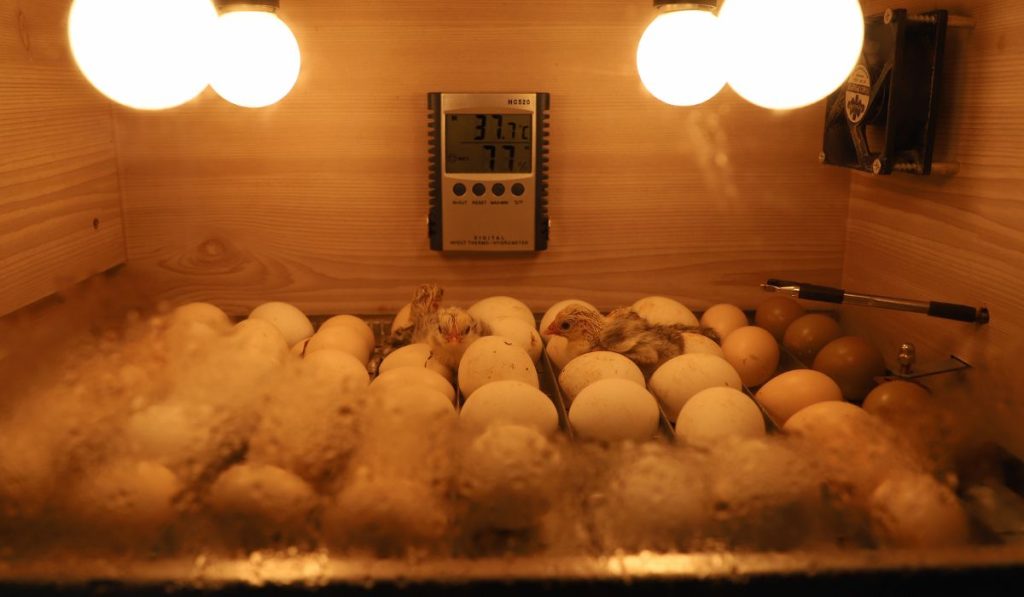
In practice, it is important that the incubator reaches a temperature of 37.5°C or 37.6°C before you put the eggs in. This temperature must be maintained throughout the incubation period.
Below this temperature, the embryos will not develop properly. Above 37.6°C, the embryos may die, which will automatically reduce the performance of the artificial incubator. In principle, the machines are pre-set, but feel free to check!
Check the humidity level of the incubator
The humidity level, also called hygrometry, is an essential factor. It is not the same throughout the incubation period as it changes as the embryo develops.
During its growth phase, it is vital for the embryo to evacuate moisture regularly. The correct level is therefore about 45% during the first 18 days of incubation. The better you control this, the better your chances of hatching.
During the hatching phase, which starts from day 19 onwards, it is essential to increase the humidity level in order to soften the shell. This will make it easier for the chick to break through before emerging. Keep in mind that it may take some time between the time the egg starts to break through and the time the chick actually emerges. Your job is to facilitate this hatching.
Consider providing a ventilation system for your egg incubator
Oxygen supply is fundamental for an egg to give birth to a healthy chick. During the growth phase, the embryo releases CO2 along with the humidity. This allows it to create a pocket of oxygen to optimise hatching. If there is not enough oxygen, the young may die long before they hatch.
The best solution to promote sufficient oxygenation is to install a ventilation system inside the incubator. The main function of the system will be to renew the air, so that the chicks will have sufficient oxygen throughout the growth phase and at the time of hatching.
The ventilation system will also optimise the heat regulation in the egg incubator. Note that some incubators already have a ventilation system, which will make your job much easier.
Optimal egg turning is beneficial
It is inside the yolk that the embryo develops during the first 18 days of incubation. The yolk, which is held in place by chalazas, is only held in one direction. As the embryo grows, the yolk will settle against the inner wall of the shell. If it remains stuck in one position, development will automatically stop.
Turning is essential to ensure that the position of the egg is changed regularly, promoting optimal growth conditions for the embryo. This should be done every 12 hours.
If you are using a manual incubator, the eggs will need to be turned manually. It is advisable to mark the eggs so that you can determine the correct direction in which to place the eggs. If you have an automatic incubator, simply check that the machine is correctly programmed.
Humidity: an important factor to improve
Of all the essential parameters for the proper functioning of an egg incubator, hygrometry requires particular attention. During the first phase of incubation, namely during the period of development of the embryo, the air pocket necessary for the future chick is equivalent to approximately 1/10th of the egg.
At the end of incubation, it represents only one third of the egg. It is in this air pocket that the chick draws the oxygen its lungs need to breathe correctly from the moment the shell is pierced.
The means of action
You have two options for checking that the humidity is correct so that the air pocket is suitable for egg development.
If you choose to candle the eggs, mark the size of the air pocket at the beginning of the incubation period. Also mark the size it should be at the end of the process. The egg candle will allow you to see inside the shell and thus check the development of the air pocket.
Alternatively, you can use a weight curve. At the end of incubation, the egg should weigh 20% less than at the beginning of incubation.
Increasing the humidity in your incubator
Using the 1/10 and 1/3 rule (depending on the stage of development of the egg), you will be able to determine if the air pocket is correct or if adjustments need to be made.
In the event that the embryo does not have a sufficient air pocket, it will be necessary to slightly reduce the humidity level inside your incubator. If you find that the air pocket is too large, you will need to slightly increase the humidity in the incubator.
To reduce the humidity, consider opening the air vent to the maximum. This will bring in more air and dry out the interior of the incubator. Conversely, to increase the humidity level, consider filling the water trays of the incubator and/or placing waterlogged sponges in the bottom of the machine.
Optimising the incubation of your eggs requires a certain amount of regularity. As it is not advisable to open the incubator too often, take advantage of the turning to carry out any other necessary manipulation. Also remember to take notes (hygrometry, turning direction, egg weight…) to optimise monitoring until hatching.


